
Import and Export MySQL Databases via phpMyAdmin
This article provides a comprehensive guide on how to import and export MySQL databases using phpMyAdmin, a popular web-based database administration tool. Whether you’re backing up your data, migrating a website, or simply transferring a database to a different server, phpMyAdmin offers a user-friendly interface to accomplish these tasks efficiently. The process is straightforward and requires no advanced technical skills. Let’s delve into the step-by-step instructions for both exporting and importing databases. We will also discuss alternative methods to Import and Export MySQL Databases via phpMyAdmin.
Exporting a MySQL Database via phpMyAdmin
Exporting your database creates a file containing the SQL commands needed to recreate the database structure and data elsewhere. This file serves as a backup and allows you to easily transfer your database. Here’s how to export your database using phpMyAdmin:
-
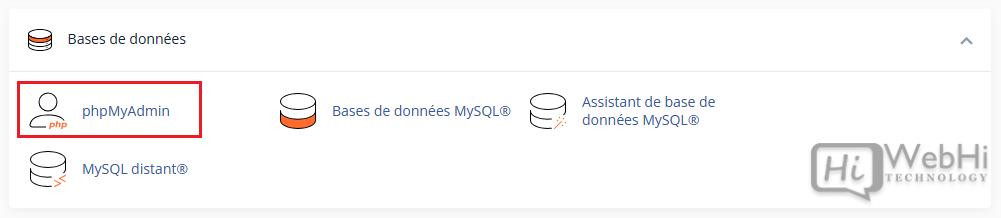
Access phpMyAdmin: Begin by logging into your hosting account’s control panel (usually cPanel, Plesk, or a similar interface). Look for the phpMyAdmin icon, typically located in the "Databases" section. Click on it to launch the phpMyAdmin interface.

-
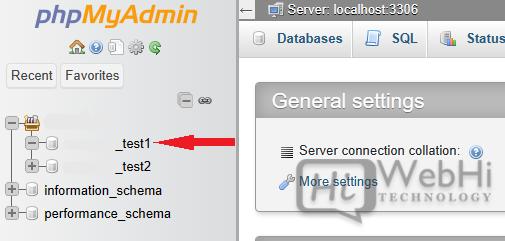
Select Your Database: Once inside phpMyAdmin, you’ll see a list of databases on the left-hand side. Click on the database you wish to export. This will load the database’s structure and tables in the main panel.


-
Navigate to the Export Tab: In the top navigation bar, you’ll find several tabs. Click on the "Export" tab.

-
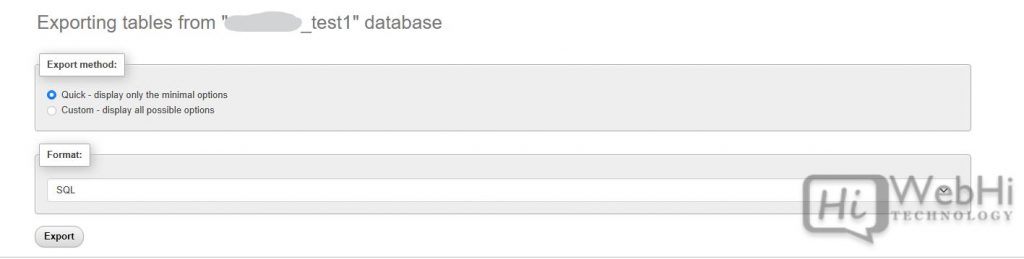
Choose Export Method: You’ll be presented with two export methods: "Quick" and "Custom."
-
Quick: This is the simplest option, using default settings to export your entire database.
-
Custom: This option allows you to fine-tune the export process, selecting specific tables, output formats, and other options.
-
-
Customize Export Settings (Optional): If you choose "Custom," you can configure the following:
- Tables: Select which tables to include in the export.
- Output: Choose how to save the exported data (e.g., save to file, view as text).
- Format: Select the output format (usually SQL).
- Compression: Choose a compression method (e.g., zip, gzip) to reduce the file size. This is especially useful for large databases.
- SQL Compatibility Mode: Select a specific SQL server version for compatibility purposes.
-
Execute the Export: After selecting your desired settings, click the "Go" button at the bottom of the page. phpMyAdmin will generate the SQL file and prompt you to download it to your computer.


Importing a MySQL Database via phpMyAdmin
Importing a database involves restoring a previously exported SQL file into a MySQL server. This is often done when migrating a website to a new host or restoring a backup.
-
Access phpMyAdmin: Log in to phpMyAdmin using your hosting account’s control panel, just as you did for exporting.
-
Create a New (Empty) Database: Before importing, make sure you already have a new (empty) database on your hosting space. You can usually create a new database through your hosting control panel. Note the database name, username, and password, as you’ll need them later.
-
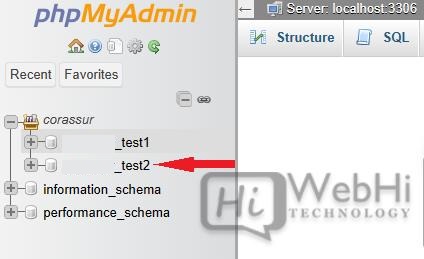
Select the Empty Database: In phpMyAdmin, select the newly created, empty database from the list on the left.

-
Navigate to the Import Tab: Click on the "Import" tab in the top navigation bar.

-
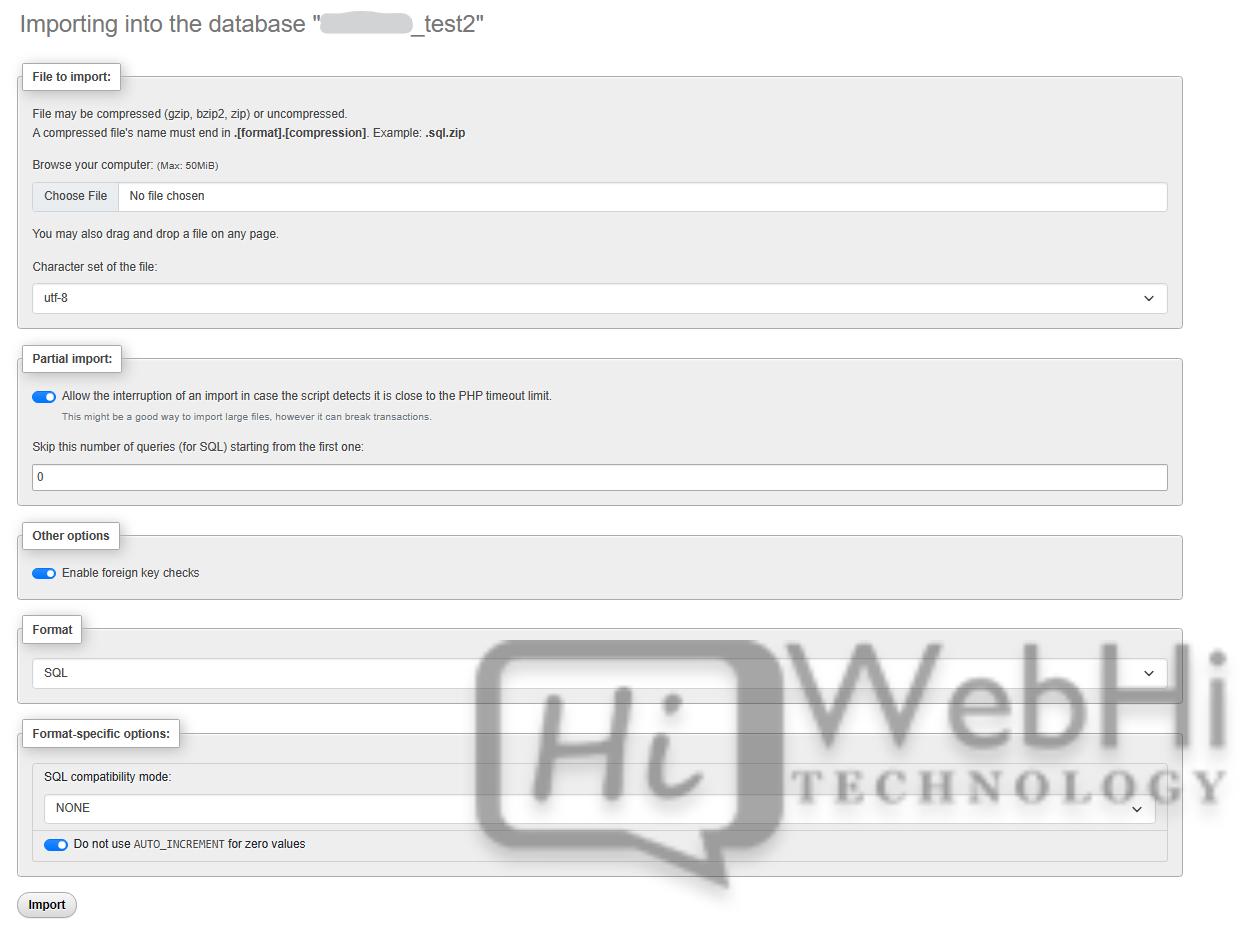
Choose the File to Import: Click the "Choose File" button and select the SQL file you exported earlier from your computer.
-
Customize Import Settings (Optional): You can adjust the import settings if needed. Common options include:
- Format: Ensure the format is set to "SQL."
- Character set: Select the appropriate character set for your database (usually UTF-8).
- Partial import: If you have a very large file, you might need to adjust the "Partial import" settings to avoid timeouts.
-
Execute the Import: Click the "Go" button at the bottom of the page. phpMyAdmin will begin importing the SQL file into the selected database.

-
Verify the Import: Once the import is complete, phpMyAdmin will display a success message. Check the database structure and data to ensure everything was imported correctly.


Alternative Methods to Import and Export MySQL Databases
While phpMyAdmin is a convenient tool, it might not be suitable for very large databases or when you need more control over the process. Here are two alternative methods:
1. Using MySQL Command-Line Tools
The MySQL command-line tools (mysqldump for exporting and mysql for importing) offer more flexibility and are often faster for large databases. These tools are typically available on servers running MySQL.
Exporting with mysqldump:
The mysqldump command creates a SQL dump of your database.
mysqldump -u [username] -p[password] [database_name] > [output_file.sql][username]: Your MySQL username.[password]: Your MySQL password (you can omit the password and you’ll be prompted for it).[database_name]: The name of the database you want to export.[output_file.sql]: The name of the file where the SQL dump will be saved.
Example:
mysqldump -u myuser -pmypassword mydatabase > mydatabase_backup.sqlThis command will create a file named mydatabase_backup.sql containing the SQL dump of the mydatabase database.
Importing with mysql:
The mysql command allows you to execute SQL commands against a MySQL server. To import a database, you can use it to execute the SQL dump file.
mysql -u [username] -p[password] [database_name] < [input_file.sql][username]: Your MySQL username.[password]: Your MySQL password (you can omit the password and you’ll be prompted for it).[database_name]: The name of the database you want to import into (must exist).[input_file.sql]: The name of the SQL file you want to import.
Example:
mysql -u myuser -pmypassword newdatabase < mydatabase_backup.sqlThis command will import the contents of mydatabase_backup.sql into the newdatabase database. This approach to Import and Export MySQL Databases via phpMyAdmin bypasses the limitations of the web interface.
2. Using a PHP Script for Import (Especially for Large Files)
For very large SQL files, phpMyAdmin’s upload limits and execution timeouts can be problematic. A PHP script can be used to chunk the SQL file and execute it in smaller batches, circumventing these limitations.
<?php
$host = 'localhost';
$username = 'myuser';
$password = 'mypassword';
$database = 'newdatabase';

$conn = new mysqli($host, $username, $password, $database);

if ($conn->connect_error) {
    die("Connection failed: " . $conn->connect_error);
}

$sql_file = 'mydatabase_backup.sql';
$delimiter = ';';
$file = fopen($sql_file, 'r');
$sql = '';

if ($file) {
    while (($line = fgets($file)) !== false) {
        $sql .= $line;
        if (substr(trim($line), -strlen($delimiter)) === $delimiter) {
            $sql = str_replace(";r", ";", $sql);
            $sql = str_replace(";n", ";", $sql);

            if ($conn->query($sql)) {
              //echo "Query executed successfullyn"; //Uncomment to show query was executed
            } else {
                echo "Error executing query: " . $conn->error . "n";
            }
            $sql = '';
        }
    }
    fclose($file);
    echo "Import completed successfully!";
} else {
    echo "Error opening file!";
}

$conn->close();
?>
Explanation:
- Database Connection: The script establishes a connection to your MySQL database using the provided credentials.
- File Handling: It opens the SQL file for reading.
- Chunking and Execution: The script reads the SQL file line by line, appending each line to a
$sqlvariable. When it encounters a delimiter (typically a semicolon;), it executes the accumulated SQL code. This allows the script to process the file in smaller chunks, avoiding memory issues and timeouts. - Error Handling: The script includes error handling to display any SQL errors that occur during execution.
How to Use:
- Save the code as a PHP file (e.g.,
import.php). - Update the
$host,$username,$password,$database, and$sql_filevariables with your actual database credentials and the path to your SQL file. - Upload the PHP file and the SQL file to your web server.
- Access the PHP file through your web browser (e.g.,
http://yourdomain.com/import.php).
This PHP script offers a more robust solution for importing large databases compared to phpMyAdmin’s direct import functionality. It provides better control over the process and reduces the risk of errors due to file size limitations or timeouts. It is another method to Import and Export MySQL Databases via phpMyAdmin.
Conclusion
Import and Export MySQL Databases via phpMyAdmin is a relatively simple process. This article has outlined the steps for both exporting and importing MySQL databases using phpMyAdmin. While phpMyAdmin is a user-friendly option, the command-line tools and PHP scripts offer more flexibility and are better suited for larger databases or situations where you need more control over the process. Choose the method that best fits your needs and technical expertise. The alternative methods provide powerful solutions for managing your MySQL databases effectively. The ability to Import and Export MySQL Databases via phpMyAdmin is an important skill for website administrators and developers alike.